
Happy Valentine's Day! Ive got a project to share with you that has nothing to do with Valentine's Day, except for the fact that I love, love, luurrrvvee the end result.
I picked up this chair from my local thrift store a little while back for $3 (yes, only $3) and it's been sitting in our garage patiently waiting for me to give it some attention. After deciding to give into my current yellow obsession, I got to work.

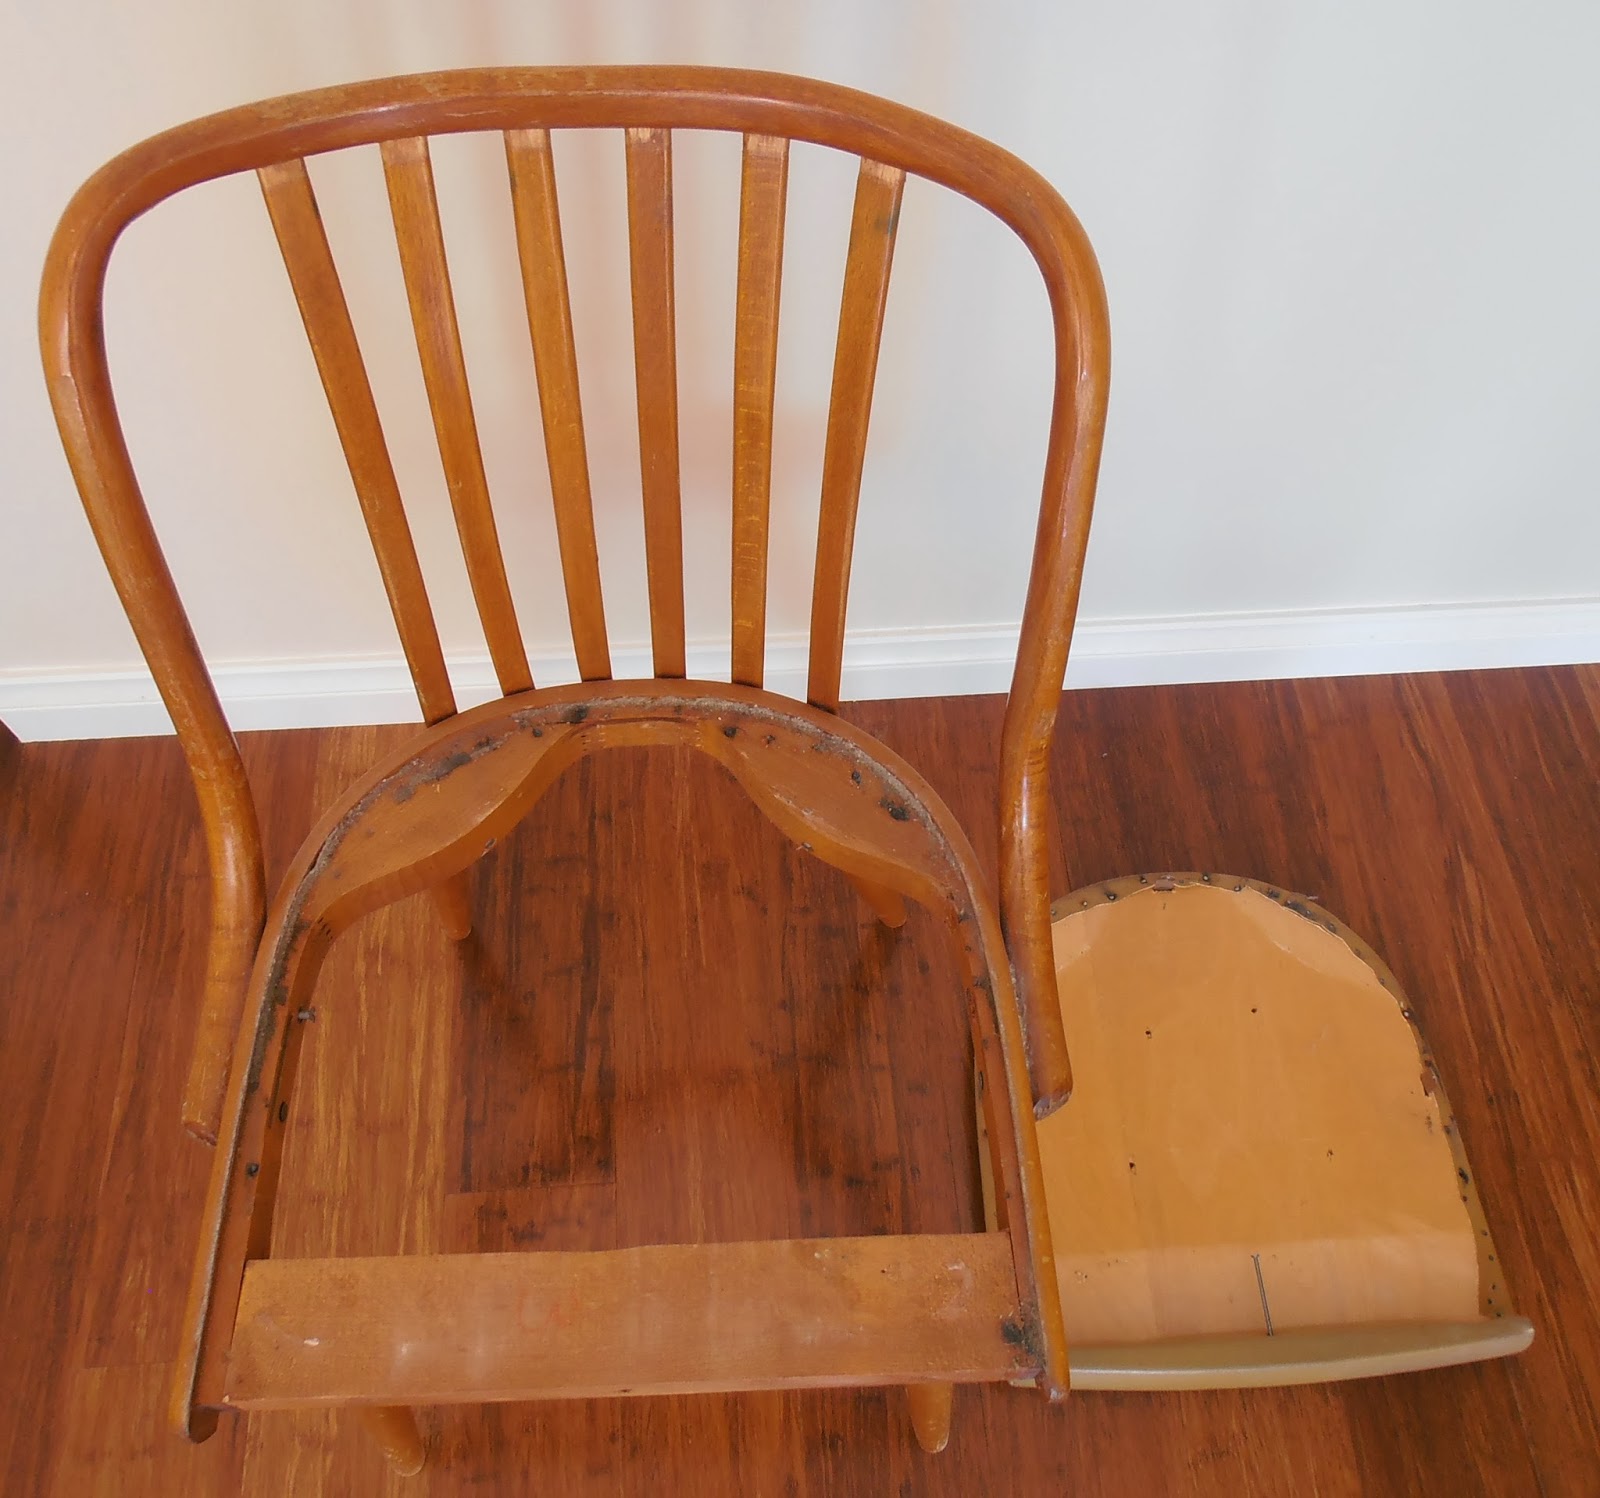
This is what the little chair looked like when I first picked it up. Fabulous lines and structurally sound, but the finish was peeling and the seat had definitely seen better days.


My first port of call was to remove the seat and clean the built up grime from the frame. The seat was held on with three screws so it was easy to remove. This is something I always check for when up-cycling furniture. If the upholstered part of the seat can only be dismantled with great effort, I give it a miss.
Step 1 - the Chair Pad
Because I hate sanding so much I put it off and decided to make the chair pad to inspire myself to keep going with the transformation! Luckily when I removed the vinyl cover the foam underneath was in good order and could be re-used.

I used the chair pad as a template and traced the outline (leaving a generous seam allowance). As my material has a pattern I was also conscious to ensure that it ran straight across the face of the seat.

I then cut one short rectangle piece for the front of the chair pad and a longer rectangle piece to wrap right around the semi-circle of the chair pad sides. I ensured that these pieces were much wider than the chair pad itself (approx 5cm over-hang), as this extra material is what will be stapled underneath the chair pad to hold it in place.

I sewed my two rectangle pieces together (right sides of the material facing) ironing the seams open when I was done. I then fitted the material to the chair pad to ensure it was a snug fit. The fit should be tight, but not so much that it's pulling. At this point, I also created some piping for the chair pad in the same material. You will need a piping foot on your sewing machine if you would like to do this. To find out how to create your own piping refer to this tutorial.

Next pin the chair pad top to the sides, sandwich-ing the piping in the middle. If you have a look at the picture below you will see how the pinning is done. Make sure you pin exactly where you will be sewing the seam. The cord of the piping should be sitting right up the sewing line and you can gauge this by feeling for the cord as you are pinning.

Before you finish pinning you will need to join the piping. Pull back the material casing you have sewn around the cord and cut the cord only, so that the two ends are touching with no excess. Ensure you leave some overlap of the casing material on one end of the piping. Fold this excess material under to create a faux hem. This will hide the rough edges of the material and neatly hide the join.

At this point you can stitch your piping circle together, or if you are lazy like me, just pin it and then continue on with the rest of the chair pad assembly.

When you've finished pinning, your chair pad should look something like this. Note the additional material hanging down below the chair pad - this should not be removed as this is what will be stapled under the chair pad to keep it in place. Carefully remove your material from the chair pad and sew your pieces together. Using the piping/zipper foot on your sewing machine, carefully sew around your pinned line, only removing each pin as you come to it.
Once sewn, place the material back onto the chair pad, flip the pad over and attach the excess material underneath using a staple gun. Ensure you pull your material firmly and use as many staples as you like, cos no one will see them!
Step 2 - the Chair Frame
The second step of my project was to tackle the sanding and painting of the chair frame. I started by thoroughly sanding the chair. I used a coarse grit paper to start with and this did easy work of removing the existing varnish. I then followed with a finer grit paper to ensure a smooth finish.
I wiped away all the dust and followed with two coats of spray stain blocker/primer. After a light sanding I then sprayed the chair in three coats of white enamel.

Now, the chair would have been completely fine if I'd left it at this point, but I decided to add just a bit more fun by giving the whole colour dip trend a go. All I did was measure up each leg to the same height and taped the legs using painters tape. It is definitely worth spending a little bit more on quality painters tape to get a nice clean line. Ive used cheaper tape in the past and ended up with colour bleeding and wonky edges.

After applying two coats of yellow paint to the bottom of each chair leg, I removed the tape while the paint was still wet and voila - one sunny dipped chair. I love the way its turned out, the trellis material still works with my somewhat "traditional" decor, but the mid century lines give it a modern twist.


So what do you think? Have you tried paint dipping on anything around your house?
Linking to:
Miss Mustard Seed
The Shabby Nest
Finding Fabulous
Chick on a Shoestring Decorating
Such a great makeover! How fun to dip the legs. I love the sunny yellow paint and chair pad.
ReplyDeleteThanks Brandi - I haven't colour dipped anything before so I thought I'd give it a try!
DeleteAmazing transformation, I love these dipped legs I keep seeing, and this is one of my favourites.
ReplyDeleteThank you Julie - I appreciate your kind words!
DeleteAwe - the chair looks very happy now! It's gorgeous! Julia
ReplyDeleteThanks Julia! Thank goodness it turned out like the picture in my head - ha ha ha
DeleteI so love this. The yellow color makes me happy!
ReplyDeleteThe Quiet Mom @ Pastrami French Dip with Bell Peppers and Caramelized Onion (http://thequietmom.com/blog/recipe/pastrami-french-dip-bell-peppers-and-caramelized-onion)
Thanks! I know what you mean, ive got a big colour crush on yellow at the moment.
DeleteOh I LOVE your chair transformation! Thanks so much for linking up to Design {it} Friday! And I featured your chair today too :)
ReplyDeleteWow - Thanks Jane that's fantastic!
DeleteYou Wonderfully transformed it..Nice..!!!Leather Button Beds
ReplyDeleteThanks Asima!
Delete